Home Page Downloads Get a Quote!

Case Moulding, Casing, Architectural Mouldings, & More!

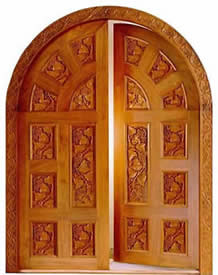
The key to a great looking door casing, and a great looking door, is perfectly mitered corners. If you have just installed...(continued below)

case mouldings
Case Moulding

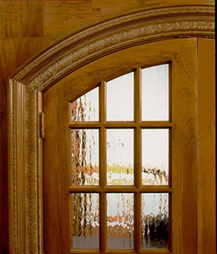
a new door that needs a case moulding around it or you have decided to replace the casing around an existing door, you can achieve professional results with our line of case mouldings

Heres some techniques for installing your case mouldings.

  1. The first thing you need to do is make sure your doorjamb is square by holding a carpenter's square in the 2 upper corners. If the corners are perfect right angles (90 degrees), you will be able to cut even 45-degree miters to assemble your casing. If they are not right angles, you will need to cut your miters slightly more or slightly less than 45 degrees to make them fit the doorjamb.
  2. Measure the height from the floor to the lower edge of the top piece of the jamb on both the left and right sides to make sure the height is uniform. If one side is higher than the other, you will need to cut that side longer than the other. Make note of your measurements. Now measure the width of the doorjamb from the inner edges. Make note of your width measurement.
  3. Next you need to determine how much of the edge of the doorjamb you want to show (or reveal). Usually about ¼" of the doorjamb is exposed all the way around. The other ½" of the jamb is covered by the door casing. If you decide to reveal ¼" all the way around, add ½" to your width measurement and ¼" to the height measurement of each side.
  4. The miter cuts are trickier than the straight cuts. Using a miter saw, cut the top piece first using the calculated dimensions from step 3. Then cut the corresponding miters on the side pieces. Remember, if you do not have 90 degree corners, you will need to cut the miters slightly greater or less than 45 degrees. Make sure the mitered corners fit together tightly.
  5. Measure and mark the left and right pieces to length. Use the measurements that you calculated in step 3. Make the straight cuts.
  6. To confirm your measurements and miter cuts, hold the casing pieces in position. Make sure the amount of doorjamb that is visible is uniform all the way around and your corners are tight.
  7. Now you need to assemble the corners before the final installation. Lay the pieces flat on ground. Glue both mitered surfaces on one of corners. Use a corner clamp to hold the 2 pieces together, making sure your miters are lined up correctly and front surfaces of both pieces are flush. Let the glue set before proceeding.
  8. From the top casing piece, drill 2 pilot holes through the top edge and into the side piece. Be careful that you do not drill through the face of the casing. Use long (3-1/2" x 6), flathead wood screws to hold the 2 pieces tightly together. Remove the clamp. Repeat this process on the other corner.
  9. Take your assembled casing and position it over the doorjamb. Make sure your reveal is even all the way around the doorjamb. Using finishing nails, tack the upper corners to the doorjamb. Do not drive the nails all the way in, just in case you need to reposition the casing. Nail the top casing piece to the doorjamb. Starting in the upper corners and working your way down, nail the side pieces of the casing to the doorjamb.
Case Moulding

Click here to browse our full Case Moulding product line.